In MobaXterm you can share sessions between your team members.
Here is a guide showing how to accomplish this.
Share the sessions between the team members:
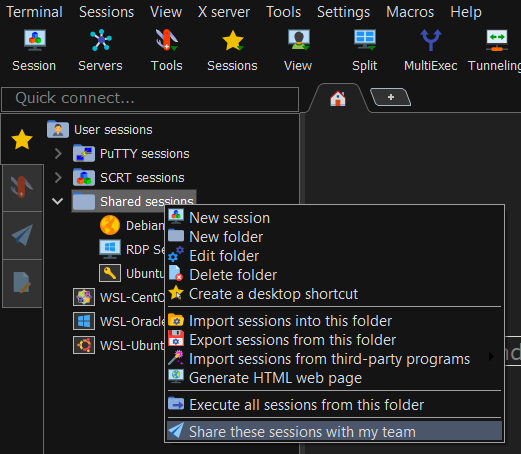
1. Create a folder with the sessions you want to share with your team
2. Right-click on the folder and select “Share these sessions with my team”
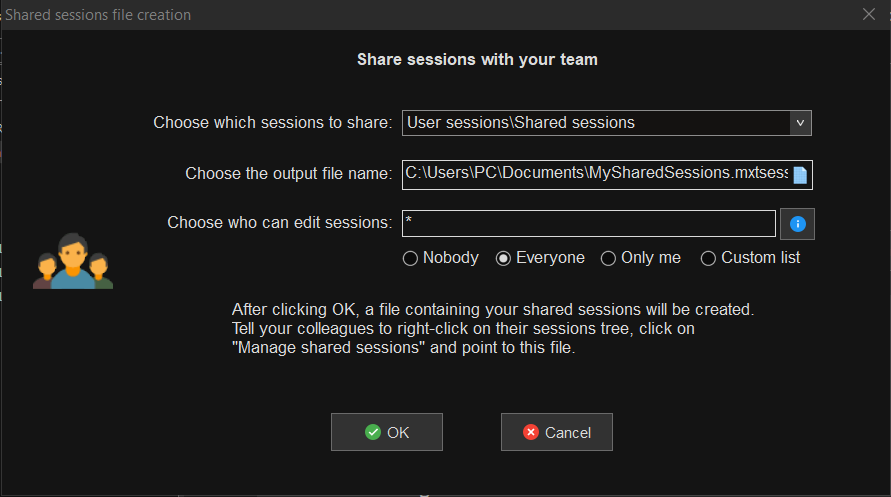
3. In this menu you can select:
-
- Which are the sessions that will be shared
- Where the shared sessions file will be saved on your computer
- Who can modify, add, or delete the shared sessions.
Note this field is provided only for convenience to teams who may share sessions and allow members to edit them: it only prevents unauthorized users from mistakenly modifying shared sessions.
However it does not provide any security: if you have write access to the file where the shared sessions are stored, you could easily edit it with a text editor or overwrite it.
If you really need to secure the shared sessions, you must secure the read/write access to the folder where the file is stored!
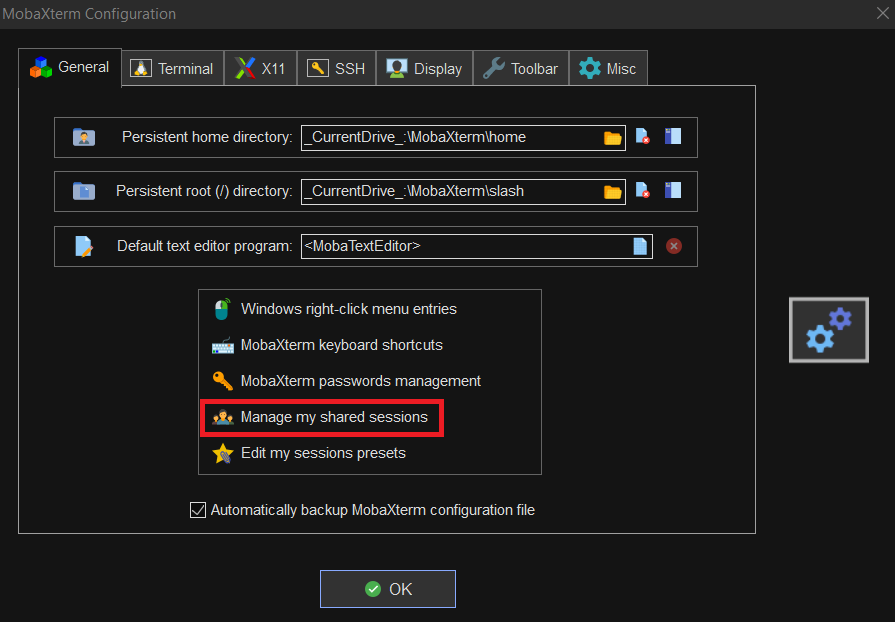
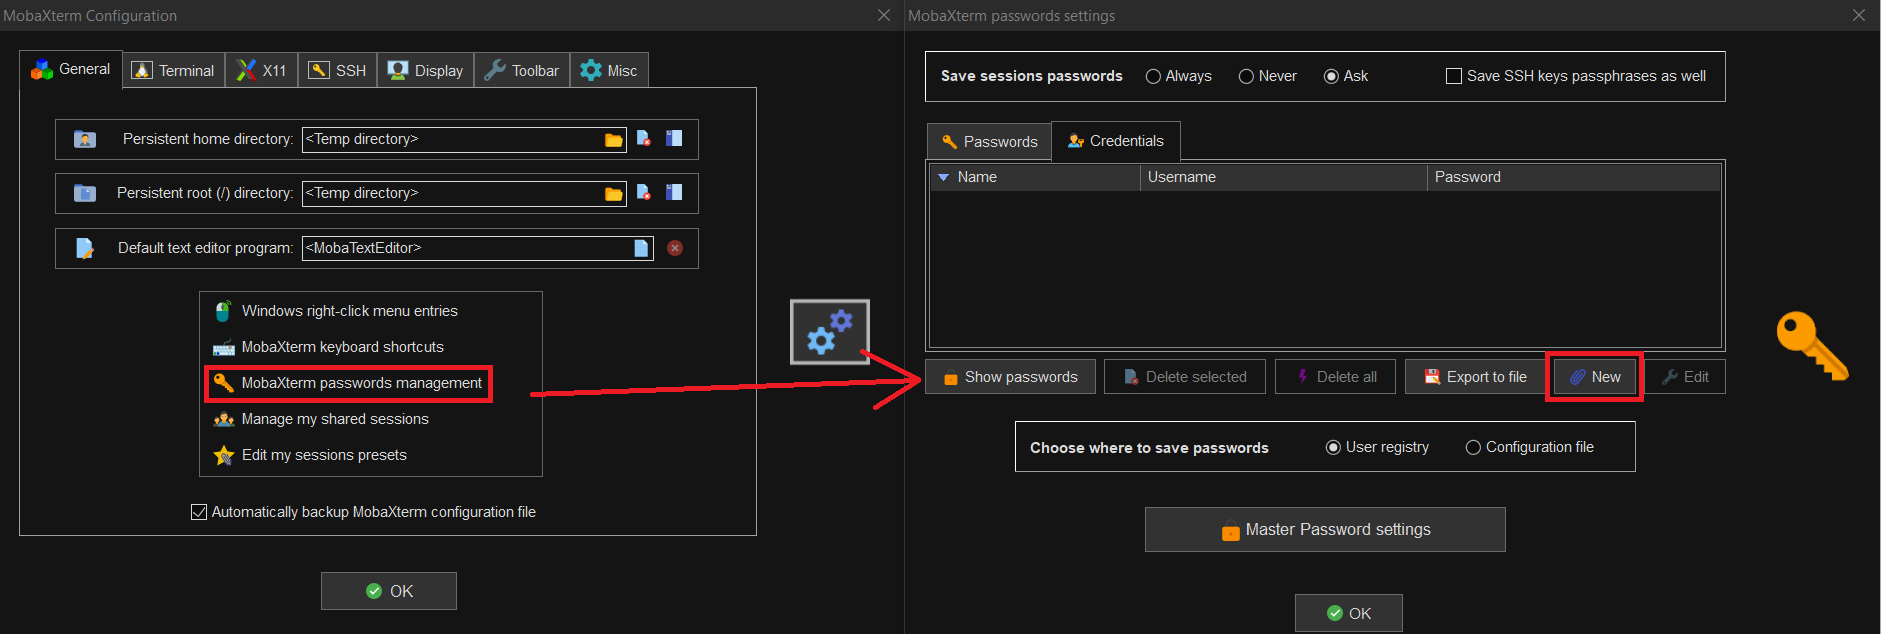
5. The next steps have to be done on a computer where you want to access the shared sessions. Open the global settings of MobaXterm and select “Manage my shared sessions”
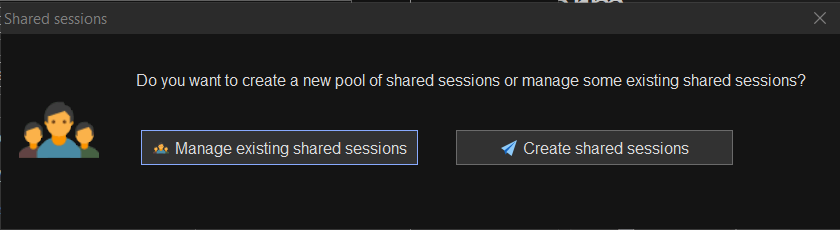
6. Select “Manage existing shared sessions”
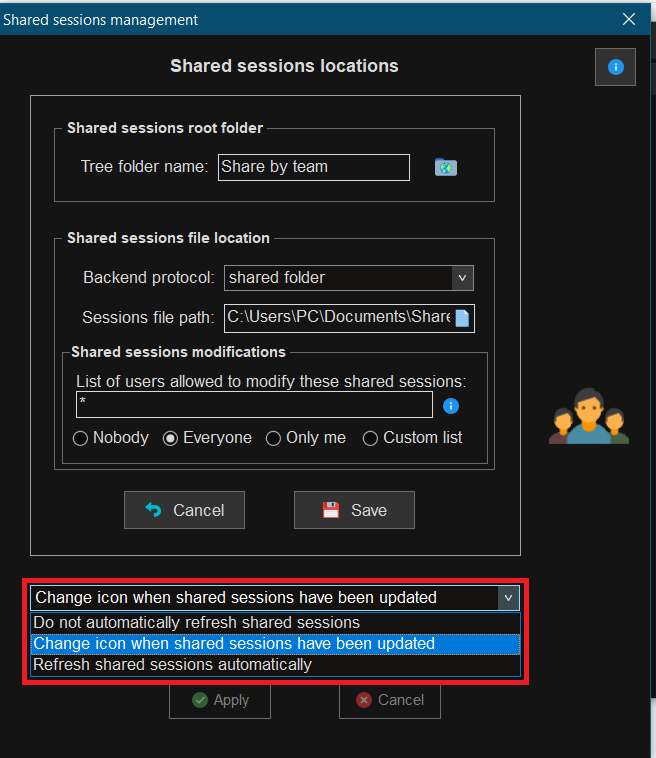
7. You will be able to configure the access to the share session on this computer:
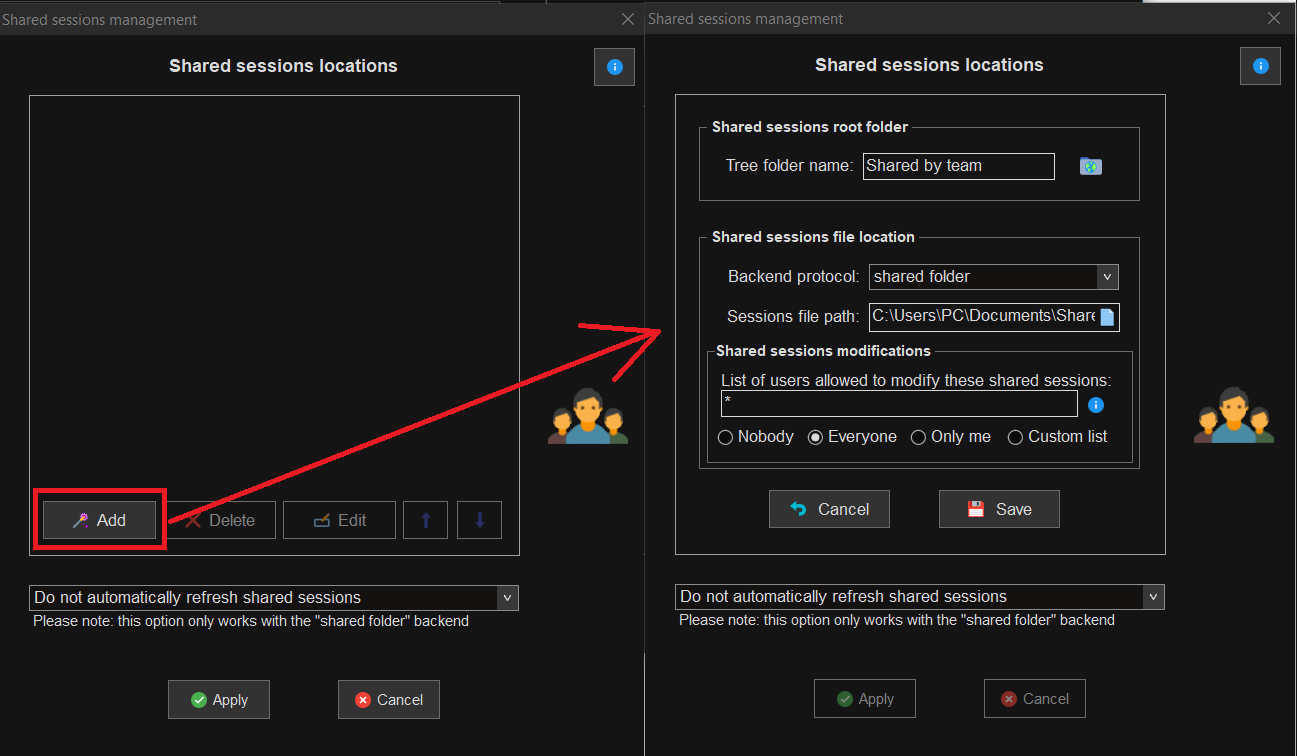
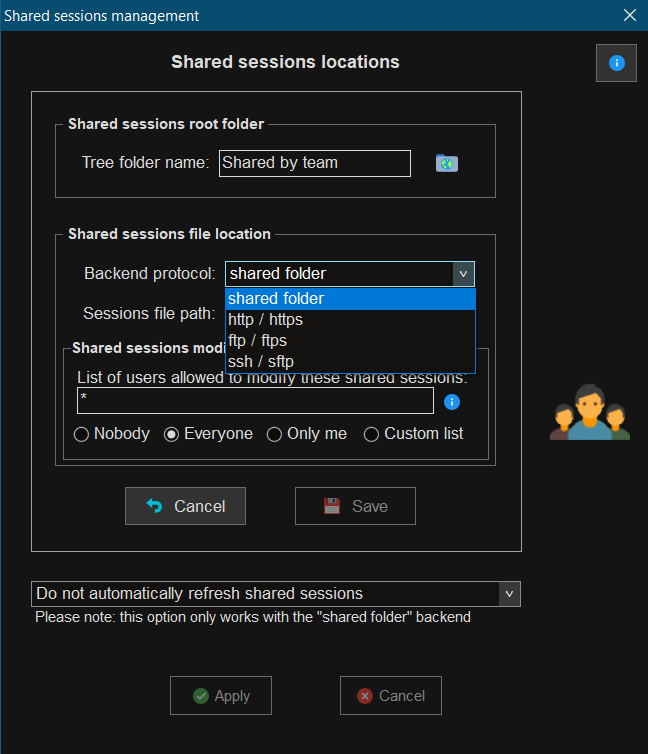
8. You can choose different backend protocols to access your shared session file
(Note: Main options are in “shared folder”)
9. You have diverse options to refresh the shared sessions:
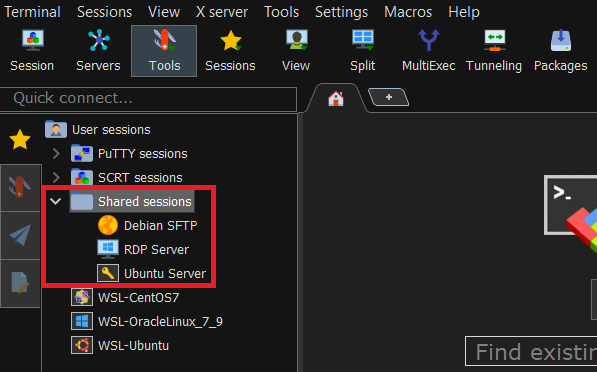
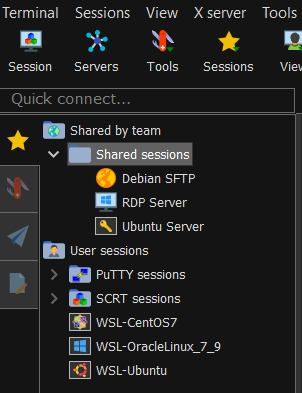
10. Your shared sessions folder should appear in the tree after applying the settings:
Users with different credentials for shared sessions
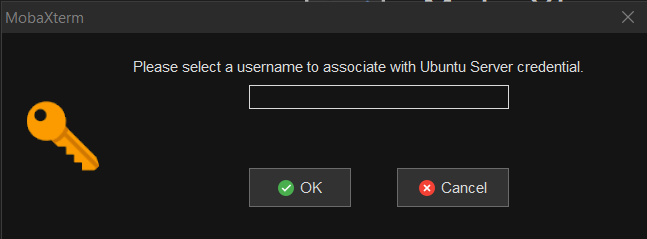
If you have different users and need to save a different credential for each user you can perform these steps:
1. On the computer where you can edit the shared sessions create a new credential:
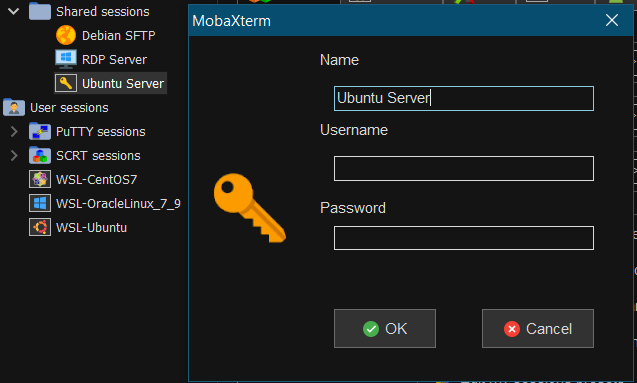
2. For the example, we will give it the name of the server we want to access.
If the credential is shared across multiple sessions, it might be useful to set a user-friendly credential so that users know which username to use.
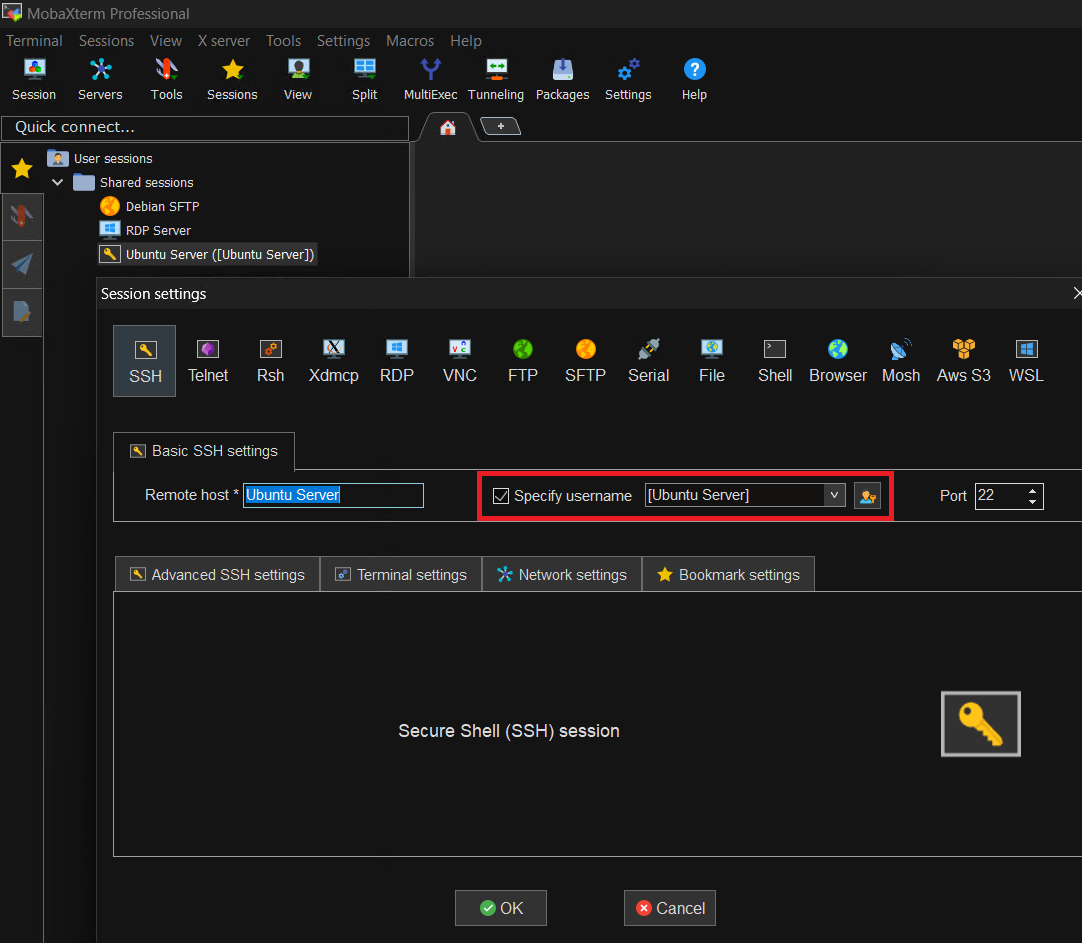
3. Then you can add the credential to the session you want to share.
4. On the computer where the sessions are shared, you should be prompted for the credential username: